

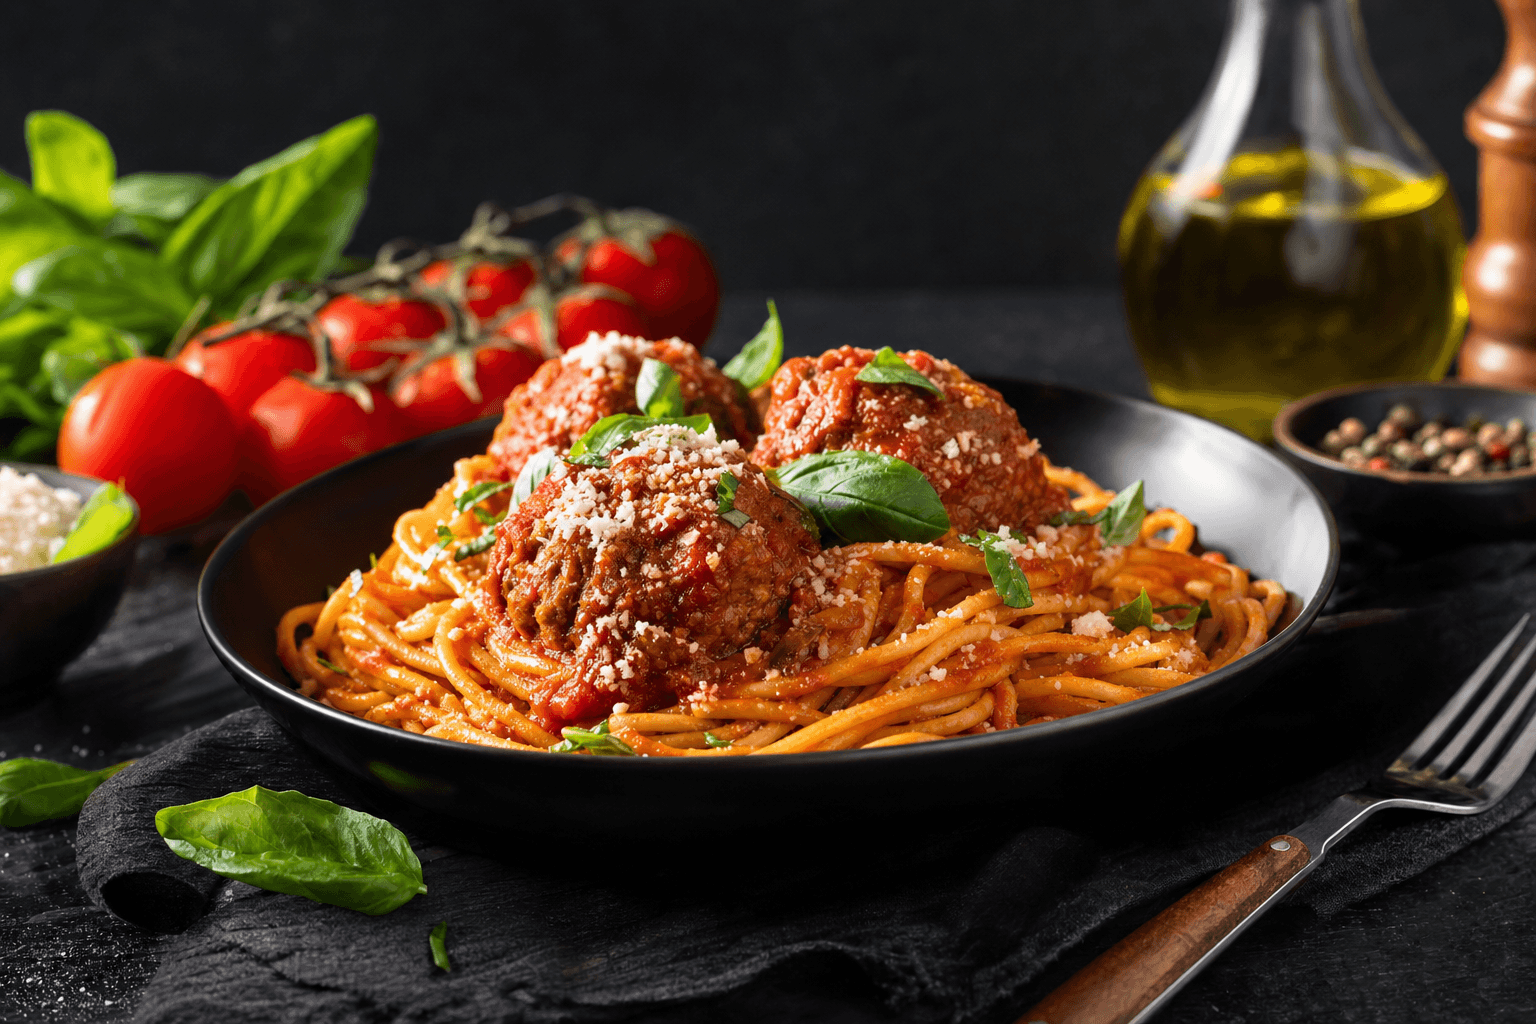
The best food photography tips combine technical precision with creative storytelling to make every dish look as delicious on screen as it tastes in person. Whether you’re shooting for a restaurant menu, social media content, or commercial campaigns, mastering lighting techniques, camera settings, composition rules, and food styling fundamentals will transform flat images into mouthwatering visuals that drive customer engagement and sales.
This guide covers everything from natural light manipulation and camera angle selection to cuisine-specific styling approaches and post-production workflows. You’ll learn how professional studios create consistent brand imagery, which techniques deliver the strongest ROI for restaurant marketing, and how to avoid the most common mistakes that make food look unappetizing.
These techniques work for both smartphone photography and professional camera setups. The principles remain the same regardless of equipment.
Quick Answer
Use soft, directional natural light from a window, shoot at a 45-degree angle with a shallow aperture (f/2.8-f/4), style with intention using the rule of thirds, and post-process minimally to preserve texture and color authenticity while enhancing appetite appeal.
Mastering Lighting: Natural vs Artificial Light for Food Photography
Lighting creates dimension, texture, and mood in food photography. It’s the difference between a flat, lifeless image and one that makes viewers feel the crispness of fresh vegetables or the steam rising from hot soup.
Natural light remains the gold standard for food photography because it renders colors accurately and creates soft, flattering shadows. But understanding when and how to supplement with artificial sources separates amateur shots from professional results.
Working with Window Light and Shadow Management
Position your setup 3-6 feet from a north-facing window for consistent, diffused natural light throughout the day. Side lighting creates the most dimension in food photography. Place your subject perpendicular to the window so light rakes across the surface at roughly 90 degrees.
Shadows add depth, but uncontrolled shadows kill appetite appeal. Use white foam core boards or professional reflectors on the opposite side of your light source to bounce fill light into shadow areas. The goal is not to eliminate shadows completely but to soften them so details remain visible.
Diffusion materials like white shower curtains or translucent fabric over windows create even softer light when direct sunlight becomes too harsh.
When to Use Artificial Lighting and Studio Setups
Artificial lighting becomes necessary when shooting after dark, in windowless spaces, or when brand consistency requires identical lighting across hundreds of menu items. Continuous LED panels or strobe lights with softboxes replicate natural window light with complete control.
A three-light setup works for most commercial food photography: one key light positioned like window light at 90 degrees, one fill light at reduced power opposite the key, and one backlight to create rim lighting on beverages or separate subjects from backgrounds.
Color temperature consistency matters more than light intensity. Set all artificial lights to 5500K (daylight balanced) and adjust your camera’s white balance to match.
Key Takeaways
- Position food perpendicular to window light for maximum texture and dimension
- Use reflectors to soften shadows without eliminating depth completely
- Match artificial light color temperature to 5500K for natural appearance
- Shoot at f/2.8-f/4 aperture to blur backgrounds while keeping food sharp
- Apply 45-degree angle as default for most plated dishes and beverages
Essential Camera Settings and Equipment for Food Photography
Camera settings create the technical foundation for sharp, well-exposed food images. Understanding the relationship between aperture, ISO, and shutter speed lets you adapt to any lighting situation while maintaining image quality.
Aperture, ISO, and White Balance Settings
Aperture controls depth of field, the zone of sharp focus in your image. Shoot between f/2.8 and f/5.6 for individual plated dishes. This range keeps the hero elements sharp while blurring distracting backgrounds into smooth bokeh.
Overhead flat lay compositions require narrower apertures. Use f/8 to f/11 when shooting directly down on multiple items to ensure everything from front to back stays in focus.
Keep ISO as low as possible, typically between 100-400. Higher ISO values introduce digital noise that degrades image quality and makes food textures look grainy.
White balance determines color accuracy. Set it manually based on your light source: 5500K for daylight, 3200K for tungsten bulbs, or use custom white balance with a gray card for perfect color. Auto white balance creates inconsistent results across a shoot.
Lens Selection: Prime vs Zoom Lenses
Prime lenses deliver sharper images and wider maximum apertures than zoom lenses at similar price points. The 50mm lens provides natural perspective and excellent low-light performance, making it the first choice for most food photographers.
Macro lenses in the 90-105mm range excel at extreme close-ups that showcase texture details like salt crystals, herb garnishes, or the layers in a cross-sectioned cake.
Zoom lenses like a 24-70mm f/2.8 offer flexibility when you cannot move easily around your subject. A polarizing filter reduces reflections on glassware and glossy surfaces while enhancing color saturation.
We shoot most restaurant projects with a 50mm f/1.4 prime lens at f/4. This aperture keeps plated elements sharp while creating enough background separation to eliminate kitchen clutter. Shooting at the lens’s maximum aperture (f/1.4) often creates too-shallow focus where garnishes go soft.
Camera Angles That Make Food Irresistible
Angle selection dramatically impacts how viewers perceive food. The same dish photographed from different heights tells completely different visual stories and triggers different appetite responses.
The 45-degree angle works as the default for most plated dishes. This three-quarter view mimics how diners naturally see food when seated at a table. It shows both the top surface and some side profile, revealing layers, height, and garnishes simultaneously.
Overhead shots (90-degree angle directly above the subject) work best for flat compositions, multiple small items, or drinks with beautiful top surfaces. Pizza, charcuterie boards, coffee with latte art, and colorful salads all shine from this bird’s-eye perspective.
This angle also works well for social media content because it allows symmetrical composition and accommodates square or vertical formats without awkward cropping. Sina and the Roopol Studio team use overhead angles extensively for Instagram content packages where consistent framing creates cohesive brand feeds.
Straight-on angles (eye level with the food) showcase height and layers in dishes like burgers, sandwiches, and towering desserts. This angle exaggerates vertical dimension and works particularly well for menu boards and promotional materials where size perception drives value perception.
For Toronto restaurant clients launching new menus, we establish one or two primary angles and stick with them across all dishes. This consistency makes the menu feel cohesive on websites and Instagram grids. Angle variety within a single brand creates visual chaos that dilutes appetite appeal.
Food Styling and Composition Techniques That Sell
Food styling transforms ingredients into subjects. It’s the intentional arrangement, garnishing, and preparation that separates documentary snapshots from commercial photography that drives purchasing decisions.
The rule of thirds divides your frame into a 3×3 grid. Place your hero element at one of the four intersection points rather than dead center. This creates dynamic tension and leaves negative space that prevents claustrophobic framing.
Odd numbers create more interesting compositions than even numbers. Style with three garnish elements instead of two, show five cookies instead of four. The human eye finds odd groupings more visually satisfying.
Layer foreground, midground, and background elements to create depth. Place a blurred prop in the immediate foreground, your sharp hero dish in the middle, and an out-of-focus background element behind.
Props should support, not compete with, food. Use neutral plates, simple linens, and complementary colors that enhance rather than distract. If you notice the prop before the food, it’s wrong.
Fresh garnishes and intentional imperfection create authenticity. A few strategically placed herb leaves, a light dusting of powdered sugar, or a drizzle of sauce that looks naturally applied makes food feel real rather than artificial.
Steam, condensation, and action shots add life. Capture rising steam from hot dishes, condensation droplets on cold beverages, or a fork lifting a bite. These moments suggest temperature, freshness, and the eating experience itself.
Ready to book a free consultation?
Sina and the Roopol Studio creative team help Toronto and GTA brands and restaurants create visual content that converts.
Food Photography Tips for Different Restaurant Types and Cuisines
Photography techniques that work beautifully for fine dining fail completely for casual comfort food. Cuisine type, restaurant positioning, and target audience determine appropriate styling, lighting, and composition choices.
Fine Dining vs Casual Restaurant Photography Approaches
Fine dining photography emphasizes artistry, plating precision, and elevated presentation. Use dramatic side lighting to create sophisticated shadows, minimal props that do not compete with chef craftsmanship, and tight compositions that focus entirely on the plate.
Shoot at f/2.8-f/4 to isolate dishes against blurred backgrounds. Include negative space generously. The visual language should communicate exclusivity, attention to detail, and culinary expertise. Color palettes tend toward muted, sophisticated tones.
Casual restaurant photography embraces abundance, comfort, and approachability. Show generous portions, melted cheese pulls, sauce drips, and the messy reality of enjoying indulgent food. These are not mistakes to clean up but selling points to emphasize.
Use brighter, more even lighting that shows every detail without heavy shadows. Include contextual props like beer bottles, checkered napkins, or rustic wood surfaces that reinforce the casual positioning. Overhead angles work particularly well because they show multiple items and shareable portions.
For Toronto GTA restaurants spanning this spectrum, Sina adjusts shooting style completely based on positioning. A high-end steakhouse receives moody, dramatic treatment while a burger joint gets bright, abundant content optimized for social engagement.
Styling Desserts, Beverages, and Specialty Items
Dessert photography requires speed because ice cream melts, whipped cream deflates, and chocolate glazes lose their glossy finish within minutes. Prepare everything before the dessert arrives, including final camera settings and composition. Backlight works beautifully for desserts with translucent elements like fruit garnishes, caramel drizzles, or the edges of delicate pastries.
Show cross-sections of layered desserts. The interior reveals more appetite appeal than just the exterior for cakes, tarts, and pastries. Use faster shutter speeds to capture drizzles or pours mid-action before they settle.
Beverage photography benefits from condensation, garnishes, and controlled reflections. Spray glycerin mixed with water onto glass surfaces to create artificial condensation that photographs better than real moisture. Use black or dark backgrounds for beverages to create dramatic contrast and make liquid colors pop.
Place a light source behind translucent drinks like cocktails, iced tea, or beer to make them glow. Capture bubbles, foam, and carbonation at their peak. Shoot beverages within 60-90 seconds of pouring for maximum visual appeal.
Specialty items like sushi, tacos, or ethnic cuisines require cultural authenticity in styling. Research traditional presentation, use appropriate serving vessels, and include culturally relevant garnishes and accompaniments. Authentic details build trust with customers familiar with the cuisine while educating those discovering it.
We keep artificial ice cubes and acrylic liquid stand-ins for beverage shoots that require extended setup time. Real ice melts under continuous lighting, creating inconsistent liquid levels across multiple shots. These pro tools maintain perfect appearance throughout long commercial sessions.
Post-Processing Workflow for Commercial Food Photography
Post-processing refines raw captures into polished final images ready for commercial use. A systematic workflow maintains consistency across large shoots while preserving natural color and texture that keeps food looking authentic.
Shoot in RAW format rather than JPEG. RAW files capture maximum image data, allowing greater flexibility in exposure adjustment, white balance correction, and shadow recovery during editing.
Establish white balance first in your editing software. Use the eyedropper tool on a neutral gray area to set accurate color, then apply that correction across all images shot under identical lighting. This maintains color consistency across menu items.
Adjust exposure to bright but not blown out. Increase shadows slightly to reveal detail in dark areas, but maintain enough contrast that the image has dimension. Enhance vibrance rather than saturation to increase intensity of muted colors while protecting already-saturated tones.
Sharpen selectively. Apply sharpening to food textures, garnishes, and hero elements while leaving backgrounds soft. Remove only genuinely distracting elements like dust, stains, or equipment reflections. Avoid over-retouching that makes food look artificial or unattainable.
Color grade for brand consistency. Establish a look (warm/cool, high/low contrast, bright/moody) and apply it across all images from a shoot using saved presets.
Batch Editing and File Organization
Batch editing accelerates workflow for large commercial shoots. Adjust one representative image perfectly, save those settings as a preset, then apply to all similar images shot under the same conditions. This technique reduces editing time from hours to minutes when processing 50-100 menu items.
Organize files systematically with clear naming conventions. Create folders by shoot date, restaurant name, or menu category. Use descriptive filenames like RestaurantName-DishName-Date.jpg rather than generic IMG_0001.jpg. This organization saves hours when clients request specific images months later.
Export in appropriate formats for end use: high-resolution JPEG at 300 DPI for print menus, optimized web-size files at 72 DPI for websites, and square or vertical crops for social media platforms. Delivering finals in multiple formats saves clients time and ensures optimal quality across channels.
When creating social media content for restaurant clients, efficient post-production workflow determines whether you can deliver 50+ edited images weekly or get bottlenecked in editing. Cloud-based delivery systems like Dropbox or Google Drive allow clients immediate access while maintaining organized archives.
Common Food Photography Mistakes to Avoid
Even experienced photographers fall into common traps that undermine food photography. Recognizing these mistakes before they happen saves time and produces better results from the start.
Overhead lighting creates flat, shadowless images that eliminate dimension and texture. Top-down illumination from ceiling fixtures produces the least appetizing food photography possible. Always use side lighting or angled light sources instead.
Shooting too close eliminates context and creates disorienting crops. While macro details have their place, most commercial food photography needs enough surrounding space to establish what the dish is and how it’s served.
Using flash directly on-camera produces harsh shadows, blown-out highlights, and unnatural color casts. If you must use flash, bounce it off a ceiling or wall to create softer, directional light.
Inconsistent styling across a menu creates visual chaos. If one burger has elaborate garnishes and professional composition while another looks hastily arranged, your brand appears inconsistent and unprofessional.
Over-editing destroys credibility. Hyper-saturated colors, extreme contrast, and heavy filters make food look artificial and create disappointment when customers receive dishes that do not match marketing images.
Neglecting backgrounds allows clutter and distractions to compete with food. A beautiful dish loses impact when photographed against messy kitchens, distracting patterns, or clashing colors.
Wrong angle selection happens when photographers choose personal preference over what showcases the dish effectively. Let the food determine the angle, not habit.
Ignoring white balance creates color casts that make food look unappetizing. Slightly too warm is usually acceptable, but cool blue casts make everything look cold and unappetizing.
Missing the freshness window costs quality. Food changes rapidly once plated. Lettuce wilts, sauces congeal, steam dissipates, and garnishes droop. Prepare everything before the dish arrives and shoot quickly.
Creating ROI-Driven Food Photography for Restaurant Marketing
Food photography delivers return on investment when images directly influence customer decisions and drive measurable business outcomes. Understanding which techniques generate results helps prioritize photography efforts and budgets effectively.
High-quality overhead shots of shareable items (appetizer platters, dessert samplers, beverage flights) generate 40-60% more social shares than individual plated items. These images perform best on Instagram and Facebook where users tag friends and plan group dining experiences.
Detail shots showing texture, steam, or ingredient quality increase perceived value and justify premium pricing. Close-ups of marbling in steaks, fresh herbs on pasta, or layers in desserts communicate quality that supports higher price points and reduces price sensitivity by 15-25%.
Lifestyle context shots (hands reaching for food, people dining together, chef preparation moments) create emotional connection that drives reservation bookings 30-45% more effectively than isolated product shots. These images work best for paid advertising and website hero sections.
Consistent styling across all menu categories builds brand recognition that compounds over time. Restaurants with distinctive, recognizable photography styles see 20-35% higher brand recall in competitive markets compared to those with inconsistent imagery.
Menu photography with professional quality increases order rates for featured items by 20-35% compared to text-only descriptions or low-quality images. High-quality images on digital menus and ordering platforms reduce decision time and increase average order values by $3-$7 per transaction according to restaurant industry studies.
Social media content performance correlates strongly with image quality and consistency. Professional food photography generates 3-5 times higher engagement rates, more shares, and better conversion on promotional posts than smartphone snapshots.
Website conversion rates improve 25-40% when food imagery follows consistent styling that builds brand recognition. Customers develop visual associations with quality, cuisine type, and experience level based on photography style.
Paid advertising performs measurably better with professional food photography. Facebook and Instagram ads featuring high-quality, properly formatted food images achieve 30-50% lower cost-per-click and 25-40% higher conversion rates compared to amateur imagery.
Measuring Photography ROI
Track menu item order rates before and after implementing new photos, social media engagement rates on professional versus amateur content, website bounce rates on menu pages, and conversion rates on promotional campaigns.
Monitor these metrics for 30 days before implementing professional photography, then compare results 60-90 days after launching new imagery. Most restaurants see measurable returns within the first quarter through increased order frequency for photographed items, reduced customer acquisition costs on social media, and improved website engagement metrics that signal stronger brand perception.
Building Consistent Visual Brand Identity Through Food Photography
Brand consistency in food photography creates immediate recognition and reinforces positioning across every customer touchpoint. Restaurants with distinctive, consistent visual styles build stronger brand associations than those with scattered imagery.
Establishing a photography style guide documents decisions about lighting mood (bright and airy versus dark and moody), composition approaches (minimal and clean versus abundant and contextual), color palettes, prop selections, and editing treatments.
Lighting consistency matters more than most restaurants realize. Switching between warm golden-hour lighting and cool overcast lighting across menu items creates subconscious discord. Choose one primary lighting approach and maintain it throughout your portfolio.
Prop libraries containing approved plates, surfaces, linens, and accessories eliminate random styling choices that create visual chaos. Limiting options actually increases efficiency while ensuring everything photographed fits the established brand aesthetic.
Angle consistency across similar dish categories builds pattern recognition. Photograph all burgers from the same angle, all cocktails from another specific angle, and all plated entrees from a third. This creates rhythm and cohesion when images appear together.
Color grading templates applied during post-processing ensure identical color treatment across shoots happening weeks or months apart. Saved editing presets maintain the same contrast levels, color temperature, and tonal qualities that define your visual brand.
For restaurants working with Roopol Studio on ongoing content needs, brand consistency guidelines get documented in the first shoot and applied across all future sessions. This systematic approach means content produced months apart appears as cohesive as if shot on the same day.
Frequently Asked Questions
What is the best lighting for food photography?
Natural window light positioned to the side of your subject creates the best lighting for food photography. Position your food 3-6 feet from a north-facing window for consistent, diffused light throughout the day. Use white reflectors opposite the window to fill shadows without eliminating depth.
What camera angle should I use for food photography?
Use a 45-degree angle as your default for most plated dishes, burgers, and items with height or layers. This angle mimics how diners naturally view food and shows both top surfaces and side profiles simultaneously. Switch to overhead angles for flat compositions, drinks with decorative tops, and multiple small items arranged together.
Do I need professional equipment to take good food photos?
You can take good food photos without professional equipment if you understand lighting, composition, and styling fundamentals. Modern smartphones produce quality results when shooting near windows with good natural light. However, professional cameras with 50mm prime lenses provide better control over depth of field and perform better in challenging lighting.
What are the best camera settings for food photography?
Set your aperture between f/2.8 and f/5.6 for individual plated dishes to create background blur while keeping food sharp. Use f/8 to f/11 for overhead flat lay shots where everything needs to stay in focus. Keep ISO between 100-400 to minimize digital noise. Set white balance manually based on your light source.
How do I make food look fresh and appetizing in photos?
Work quickly once food is plated because freshness deteriorates rapidly under lights. Prepare all camera settings, lighting, and composition before the dish arrives. Use garnishes strategically placed rather than scattered randomly. Show texture through proper side lighting that creates dimension. Capture steam, condensation, or action moments that suggest temperature and freshness.
Transform Your Restaurant’s Visual Content Today
The best food photography combines technical mastery with creative storytelling that makes every dish look as delicious in images as it tastes in person. From lighting control and camera settings to styling approaches and post-production workflows, these techniques work together to create appetite appeal that drives customer engagement and sales.
Sina and the Roopol Studio team bring this expertise to Toronto and GTA restaurants and food brands that need consistent, professional visual content across menus, websites, and social media platforms. Whether you’re launching a new menu, refreshing your brand identity, or building an ongoing content strategy, professional food photography delivers measurable results that justify the investment. Book a free consultation to discuss your restaurant’s visual content needs and discover how strategic food photography can elevate your brand and drive business growth.