

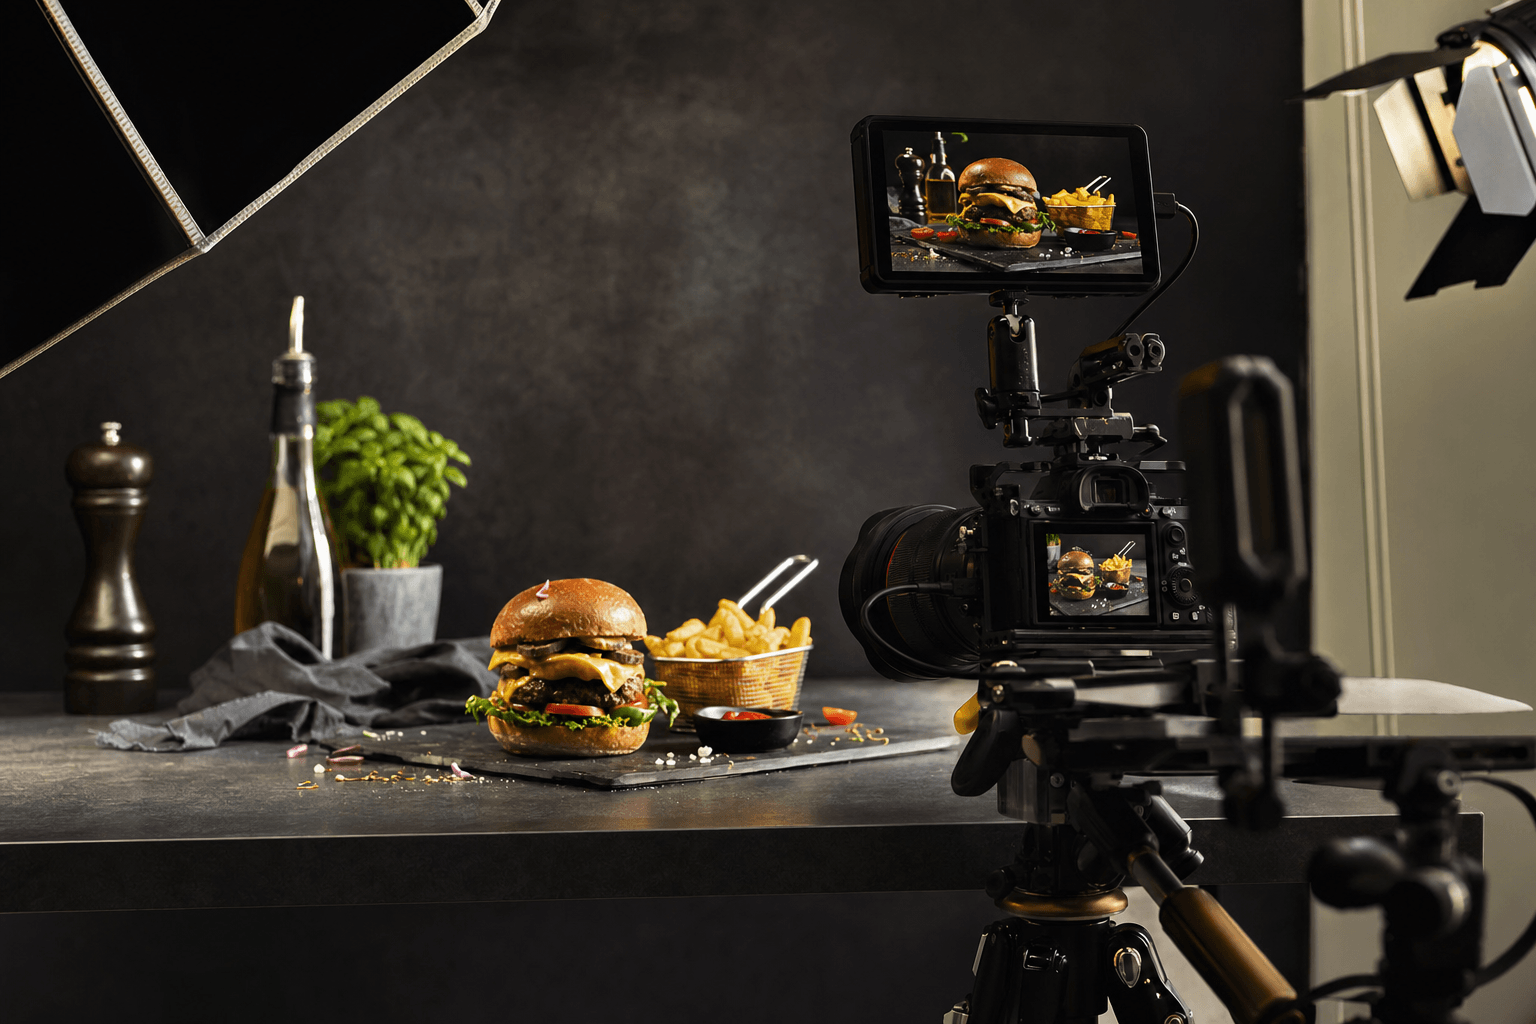
How to Do Food Videography: Expert Guide to Shooting Professional Food Videos
Food videography transforms static dishes into dynamic visual stories that drive engagement, sales, and brand recognition. Whether you’re a restaurant owner creating content for social media or a creative professional building a portfolio, knowing how to do food videography properly means mastering equipment choices, lighting techniques, camera settings, shooting workflows, and editing processes that make dishes look irresistible on screen.
This guide covers the complete food videography process from pre-production planning through final delivery. You’ll learn which cameras and stabilization gear work best, how to light food for maximum appetite appeal, what camera settings and angles create professional results, how to capture authentic kitchen audio, and how to edit and color grade footage that converts viewers into customers.
Quick Answer
Food videography requires balanced lighting (natural or softbox), stable camera support, proper settings (4K at 24-60fps, shallow depth of field), strategic angles (top-down and 45-degree), authentic audio capture, and color grading that enhances appetite appeal while maintaining accurate food tones.
Essential Equipment for Food Videography
Your equipment choices shape everything else in your food videography workflow. You don’t need the most expensive gear to create professional results, but you do need tools that give you control over focus, exposure, and movement.
Start with camera selection. The Canon EOS R6 and Canon EOS R8 deliver exceptional 4K video quality with reliable autofocus and excellent low-light performance. For tighter budgets, the Canon M50 offers 4K recording with strong color science. Modern smartphones, particularly iPhone Pro models, capture 4K footage with impressive dynamic range that rivals dedicated cameras in good lighting conditions.
Lenses matter more than camera bodies. For food videography, prime lenses in the 35mm to 85mm range provide natural perspective without distortion. A 50mm f/1.8 delivers beautiful shallow depth of field that isolates dishes from backgrounds. Macro lenses capture extreme close-ups of textures like glistening sauce drops or steam rising from hot food.
Camera movement adds energy but shaky footage destroys professionalism. Stabilization comes through in-body stabilization, gimbals for smooth motion, and sliders or tripods for controlled movement. Top-down shots require overhead rigs or C-stands that position cameras directly above cooking surfaces.
Key Takeaways
- Choose cameras with manual controls and 4K capability for flexibility
- Invest in stabilization before upgrading camera bodies for smoother footage
- Use diffused lighting to eliminate harsh shadows and enhance textures
- Shoot at 24fps for cinematic feel or 60fps for slow-motion
- Capture authentic kitchen audio separately with directional microphones for mixing
- Color grade specifically to enhance appetite appeal while maintaining accuracy
Lighting Techniques That Make Food Look Irresistible
Lighting transforms ordinary dishes into crave-worthy visuals. Bad lighting flattens texture, creates unflattering shadows, and makes fresh food look dull. Proper lighting reveals dimension, enhances colors, and creates the visual appeal that makes viewers hungry.
The quality of light matters more than quantity. Soft, diffused light wraps around food and reveals texture without harsh shadows. Direction controls mood. Side lighting emphasizes texture and creates depth. Backlighting creates rim light that separates subjects from backgrounds and makes liquids glow.
Natural light from large windows creates beautiful, soft illumination that flatters most dishes. Position your setup near windows that receive indirect light, not direct sunlight that creates harsh shadows. North-facing windows provide consistent, soft light throughout the day. The downside is consistency. Natural light changes throughout the day and disappears after sunset.
Artificial lighting lets you work anytime, anywhere. LED panels with adjustable color temperature match daylight or tungsten sources. For commercial shoots with tight timelines, artificial lighting provides control and repeatability. When working with Toronto restaurant clients, Sina at Roopol Studio often combines window light with carefully positioned bounce cards to maintain natural color temperature while controlling shadow depth.
Softbox Lighting and Three-Point Setup
Softbox lighting creates the diffused quality that makes food look appetizing. A 24-inch softbox positioned close to your subject creates beautiful, wrap-around light. The classic three-point setup uses a key light as the main source, a fill light to soften shadows, and a backlight to separate the subject from the background.
For food videography, place your key light at a 45-degree angle to one side, slightly above the dish. Add a white bounce card or low-intensity fill light on the opposite side to control shadow depth. Skip the traditional backlight in favor of rim lighting positioned behind and slightly above the food. This creates edge definition and makes steam, liquids, and sauces glow with appetizing luminosity.
Sina and the Roopol Studio team use large diffusion panels positioned between lights and food to create window-like quality in commercial shoots. This approach mimics natural light’s softness while maintaining complete control over direction and intensity, critical for multi-hour restaurant shoots where natural light would shift dramatically.
Camera Settings, Angles, and Positioning
Technical settings determine whether your footage looks professional or amateurish. Shoot in 4K even if your final delivery is 1080p. The extra resolution gives you cropping flexibility in post-production and maintains quality when clients need content reformatted for different social media platforms.
Frame rate shapes motion feel. Shoot at 24fps for cinematic, film-like motion. Use 30fps for standard video that matches most online content. Record at 60fps or 120fps when you need slow-motion capability for dramatic pour shots, knife cuts, or steam rising from hot dishes.
The 180-degree shutter rule maintains natural motion blur. Set your shutter speed to double your frame rate. At 24fps, shoot at 1/50 second. At 60fps, use 1/120 second. Aperture controls depth of field and light intake. Wide apertures like f/1.8 or f/2.8 create shallow focus that isolates dishes from backgrounds. Stop down to f/4 or f/5.6 when you need multiple elements in focus.
Top-Down and Multi-Camera Angle Setups
The top-down camera angle has become synonymous with food videography, particularly for recipe content and cooking processes. Position your camera directly above your subject, parallel to the table or cooking surface. This angle shows spatial relationships between ingredients, reveals plating composition, and creates clean, graphic compositions.
The 45-degree angle, positioned slightly above eye level looking down at the dish, creates dimensional depth while showing both the top and sides of food. This angle works beautifully for hero shots of plated dishes, revealing height, layers, and garnishes. Eye-level shots put viewers at the table, creating intimacy and invitation. These angles work well for burger cross-sections, stacked pancakes, or any dish where height matters.
Multi-camera setups capture different angles simultaneously, essential for process videos where action happens once. Position one camera overhead for the master shot and a second camera at 45 degrees for detailed close-ups. Synchronize footage in post using audio waveforms or visual cues.
Ready to book a free consultation?
Sina and the Roopol Studio creative team help Toronto and GTA brands and restaurants create visual content that converts.
The Food Videography Shooting Process
Pre-production planning determines shoot success. Create shot lists that break down every angle and movement you need. For restaurant projects, coordinate with kitchen staff to understand timing, identify signature dishes, and schedule shooting during slower service periods when chefs can focus on camera-ready preparation.
Food styling makes the difference between amateur and professional results. Fresh ingredients always look better than wilted or dried-out ones. Keep backup portions ready since dishes deteriorate under hot lights. Use tricks like undercooking vegetables slightly so they maintain color and structure, or adding oil to surfaces to create appetizing shine.
Steam adds life to hot dishes but dissipates quickly. Capture steam shots immediately after plating. Some videographers use steam machines or water-soaked cotton hidden behind dishes to generate continuous steam for longer takes.
B-roll footage provides editing flexibility and storytelling depth. Shoot ingredients, preparation techniques, cooking processes, restaurant atmosphere, and detail shots of textures. These cutaway shots cover transitions, add context, and extend storytelling beyond the hero food shots.
Time remapping creates visual interest. Shoot at high frame rates, then slow down key moments like syrup pours, knife cuts through layered dishes, or steam rising. These slow-motion moments give viewers time to appreciate texture and craft.
Audio Capture and Kitchen Sound Recording
Sound matters more than most food videographers realize. Sizzling, chopping, pouring, and cooking sounds trigger visceral responses that make food more appealing. Poor audio makes professional footage feel amateur. Great audio adds dimension that visual alone cannot achieve.
Camera-mounted microphones capture room tone but lack the presence and clarity that makes cooking sounds compelling. These small microphones pick up camera handling noise, autofocus motors, and distant sounds with equal prominence to the sounds you actually want.
Shotgun microphones mounted on boom poles or stands let you position audio capture closer to the action without appearing in frame. Aim the microphone at the sound source from just outside the camera’s field of view. A Rode NTG series or Deity D3 Pro captures clean, focused audio with minimal background noise.
Kitchen environments present specific miking challenges. Ventilation systems create constant background noise. Multiple conversations, music, and equipment sounds compete for attention. Scout locations before shoot days to identify audio problems. Use directional microphones that reject off-axis noise positioned 12-18 inches from cooking surfaces to capture authentic sizzle, chopping, and pouring sounds without picking up excessive ventilation rumble.
Record audio separately at high quality rather than relying on camera audio. Use a dedicated audio recorder like a Zoom H5 or H6 for cleaner preamps and more control. Sync audio in post using visual cues or automatic synchronization tools in editing software.
Layer sounds in post-production for maximum impact. Combine close-miked sizzle sounds with ambient kitchen atmosphere and music beds. Keep cooking sounds prominent in the mix, slightly louder than feels natural. This exaggerated presence makes food more appealing without sounding artificial. Foley techniques enhance inadequate production audio by recording additional sounds in controlled environments, then layering them over footage during editing to create richer, more engaging soundscapes.
The Roopol Studio team captures kitchen audio at higher levels than typical video work because cooking sounds contain transient peaks that clip easily. Recording at lower input gain preserves these peaks in the waveform while maintaining clean noise floor, giving much more flexibility when mixing final audio.
Video Editing and Color Grading for Food Content
Editing transforms raw footage into compelling stories. Adobe Premiere Pro dominates professional food videography editing because of its integration with After Effects and powerful color grading tools. Final Cut Pro offers faster performance on Mac systems. DaVinci Resolve provides industry-leading color grading and professional editing tools in its free version.
Start editing with organization. Create bins for A-roll, B-roll, audio, graphics, and music. Name clips descriptively so you can find specific shots quickly. Build a rough cut that establishes pacing and story flow before worrying about detailed timing or color correction.
Pacing determines engagement. Quick cuts maintain energy for social media content where attention spans measure in seconds. Longer takes let viewers appreciate dish details in hero shots. Vary pace throughout longer videos to maintain interest. Build intensity through music and cutting speed, then release tension with slower moments.
Sound design happens in editing. Balance dialogue, cooking sounds, and music so each element serves its purpose without overwhelming others. Duck music levels during important cooking sounds or dialogue. Add room tone to fill gaps between shots and create smooth audio continuity.
Color Grading Workflows for Food
Color grading enhances appetite appeal while maintaining accurate food representation. Boost saturation slightly to make colors pop without crossing into unrealistic territory. Warm up color temperature by 200-400K to create inviting, cozy tones. Increase contrast to add punch and separation between elements.
Primary color correction establishes consistent exposure and white balance across all footage. Secondary color grading targets specific elements. Isolate dishes using color selection tools or masks, then adjust only the food without affecting backgrounds. Add warmth to baked goods, richness to chocolates, and vibrancy to fresh vegetables.
Color grading workflows specifically for food content require understanding how colors affect appetite. Reds, oranges, and warm yellows increase appeal. Cool blues and greens work well as accent colors but make food look unappetizing if they dominate. Maintain accurate skin tones when hands or people appear in frame. Skewed skin tones destroy credibility even if food looks great.
LUTs (Look-Up Tables) provide starting points for consistent color grades. Create custom LUTs for specific restaurant clients or brand guidelines. This ensures visual consistency across multiple videos and shoots. Export LUTs to share with other videographers working on the same brand projects.
Export settings determine final quality. For social media, export at platform-specific resolutions: 1080×1080 for Instagram feed, 1080×1920 for Stories and Reels, 1920×1080 for YouTube and Facebook. Use H.264 codec with high bitrate (15-20 Mbps for 1080p, 35-50 Mbps for 4K) to minimize compression artifacts. Deliver in MP4 format with AAC audio for universal compatibility.
Commercial Food Videography: Client Deliverables and Business Considerations
Commercial food videography differs fundamentally from content creation for personal brands or social media practice. Restaurant clients and food brands need specific deliverables that serve business objectives, while content creators require different approaches. Understanding these requirements separates hobbyists from professional videographers who build sustainable businesses.
What Clients Actually Need: Deliverables and Expectations
Restaurant clients typically need multiple video formats optimized for different platforms. A single shoot produces 16:9 hero videos for websites and YouTube, 1:1 square versions for Instagram feed posts, and 9:16 vertical cuts for Stories, Reels, and TikTok. Each format requires different framing considerations planned during the shoot.
Food brands often request longer-form content for campaigns alongside shorter social cuts. A 60-second brand story might be accompanied by ten different 6-15 second clips optimized for paid advertising. These shorter versions need to work independently, each with clear messaging and strong opening hooks.
Content creators working on sponsored partnerships need deliverables that balance authentic voice with brand requirements. These projects typically involve more creative freedom but require approval processes and adherence to brand guidelines regarding logos, messaging, and product presentation.
Raw footage delivery appears frequently in commercial contracts. Clients want unedited files for future use by internal teams or other vendors. Price raw footage separately since it requires additional hard drive costs, extensive file organization and labeling, and potential loss of control over how your footage gets used.
Turnaround expectations vary by client type. Restaurant clients often need quick turnaround for timely seasonal menu promotions or event marketing. Standard delivery runs 1-2 weeks for edited videos. Rush delivery within 48-72 hours commands 25-50% premium fees. Communicate realistic timelines during project scoping to avoid disappointment.
Revision rounds need clear boundaries in contracts. Include one or two revision rounds in base pricing to address client feedback. Additional revisions beyond contractual limits incur hourly fees or flat revision charges. This protects your time while giving clients reasonable flexibility.
Usage Rights, Licensing, and Legal Considerations
Usage rights and licensing represent significant value in commercial videography contracts. These terms determine where, how long, and in what context clients can use your footage. Clear licensing agreements prevent disputes and ensure fair compensation for the value you provide.
Unlimited usage rights allow clients to use footage across all channels indefinitely, including paid advertising, organic social media, websites, print materials, and broadcast. This comprehensive license commands premium pricing, often 50-100% above base production fees, because you’re granting perpetual, unrestricted access.
Limited licenses restrict usage to specific platforms, durations, or geographic regions. A restaurant might license video for organic social media use only, excluding paid advertising. Or a brand might purchase one-year exclusive rights with renewal options. Limited licenses cost less initially but may require monitoring and generate recurring revenue through renewals.
Distinguish licensing needs by client type. Local restaurants typically need usage rights for their own marketing channels within their geographic market. National food brands may require broader rights including distribution to franchisees, retail partners, and advertising agencies. Content creators collaborating on sponsored content need limited licenses that protect both the videographer’s work and the sponsor’s investment while allowing portfolio use.
Exclusivity clauses prevent you from creating similar content for competitors during specified periods. Exclusive agreements command premium pricing since they limit your ability to serve other clients in the same market segment. Define exclusivity scope clearly: does it prevent all restaurant work or only direct competitors in the same cuisine category?
Portfolio and promotional usage rights work both directions. While granting clients usage rights for their purposes, retain rights to use footage in your portfolio, website, and marketing materials unless the client specifically purchases exclusivity that prevents such use.
Insurance and liability protect both parties in commercial arrangements. Professional liability insurance covers errors, omissions, and potential legal claims. Equipment insurance protects against gear damage or theft during shoots. General liability insurance covers property damage or injuries at shoot locations. Many commercial venues and clients require proof of insurance before granting location access or signing contracts.
Written contracts formalize all these considerations. Every commercial project needs a contract specifying deliverable formats, revision rounds, timeline, usage rights, payment terms, and cancellation policies. Clear documentation prevents misunderstandings and provides legal protection if disputes arise.
Frequently Asked Questions
What equipment do I need to start shooting food videos?
Start with a camera capable of 4K video (smartphone, mirrorless, or DSLR), a sturdy tripod for stability, soft lighting (natural window light or LED panels with diffusion), and basic audio recording equipment (external microphone). Invest in stabilization and lighting before upgrading camera bodies since these factors impact perceived quality more than sensor specifications.
Can I shoot professional-looking food videos with just a smartphone?
Yes, modern smartphones capture excellent 4K footage that rivals dedicated cameras in good lighting. Maximize smartphone results by shooting in natural light or with external LED lights, using apps with manual exposure and focus control, adding external lenses for different focal lengths, and investing in stabilization like gimbals or tripods.
What is the best lighting setup for food videography?
The most effective food lighting uses soft, diffused light positioned at 45-degree angles to create dimension while minimizing harsh shadows. Combine a key light on one side with fill light (bounce card or low-intensity LED) on the opposite side to control shadow depth. Add rim lighting from behind to separate food from backgrounds and make liquids glow.
What camera settings and frame rate should I use for food videography?
Shoot in 4K resolution at 24fps for cinematic feel or 30fps for standard video. Use 60fps or 120fps when you need slow-motion for dramatic moments like pours or cuts. Set shutter speed to double your frame rate (1/50 at 24fps). Choose apertures between f/1.8 and f/5.6 depending on desired depth of field.
How do I make food look more appetizing in videos?
Use fresh ingredients, proper lighting that reveals texture and color, strategic camera angles that show dimension, and color grading that enhances warmth and saturation without looking artificial. Shoot immediately after plating while food looks fresh. Capture steam from hot dishes quickly. Use shallow depth of field to isolate dishes. Layer authentic cooking sounds in post-production.
Creating Food Videos That Drive Business Results
Food videography combines technical skill with creative vision and strategic thinking. The equipment matters less than understanding how to use light, composition, movement, and sound to create appetite appeal. Professional results come from mastering fundamentals: stable camera support, soft diffused lighting, proper exposure and focus, authentic audio, and color grading that enhances without distorting.
Commercial food videography adds business considerations. Clients need specific deliverables formatted for multiple platforms, clear usage rights, realistic turnaround times, and content that serves marketing objectives. Success requires understanding both production craft and client needs.
Sina and the Roopol Studio team bring comprehensive food videography expertise to Toronto and GTA restaurant and brand clients. From pre-production planning through final delivery, we create professional food video production that drives engagement and converts viewers into customers.
Ready to create food video content that elevates your brand and drives measurable results? Book a free consultation with Roopol Studio. We’ll discuss your project goals, timeline, and deliverables, then create a custom production plan that fits your budget and marketing strategy.