

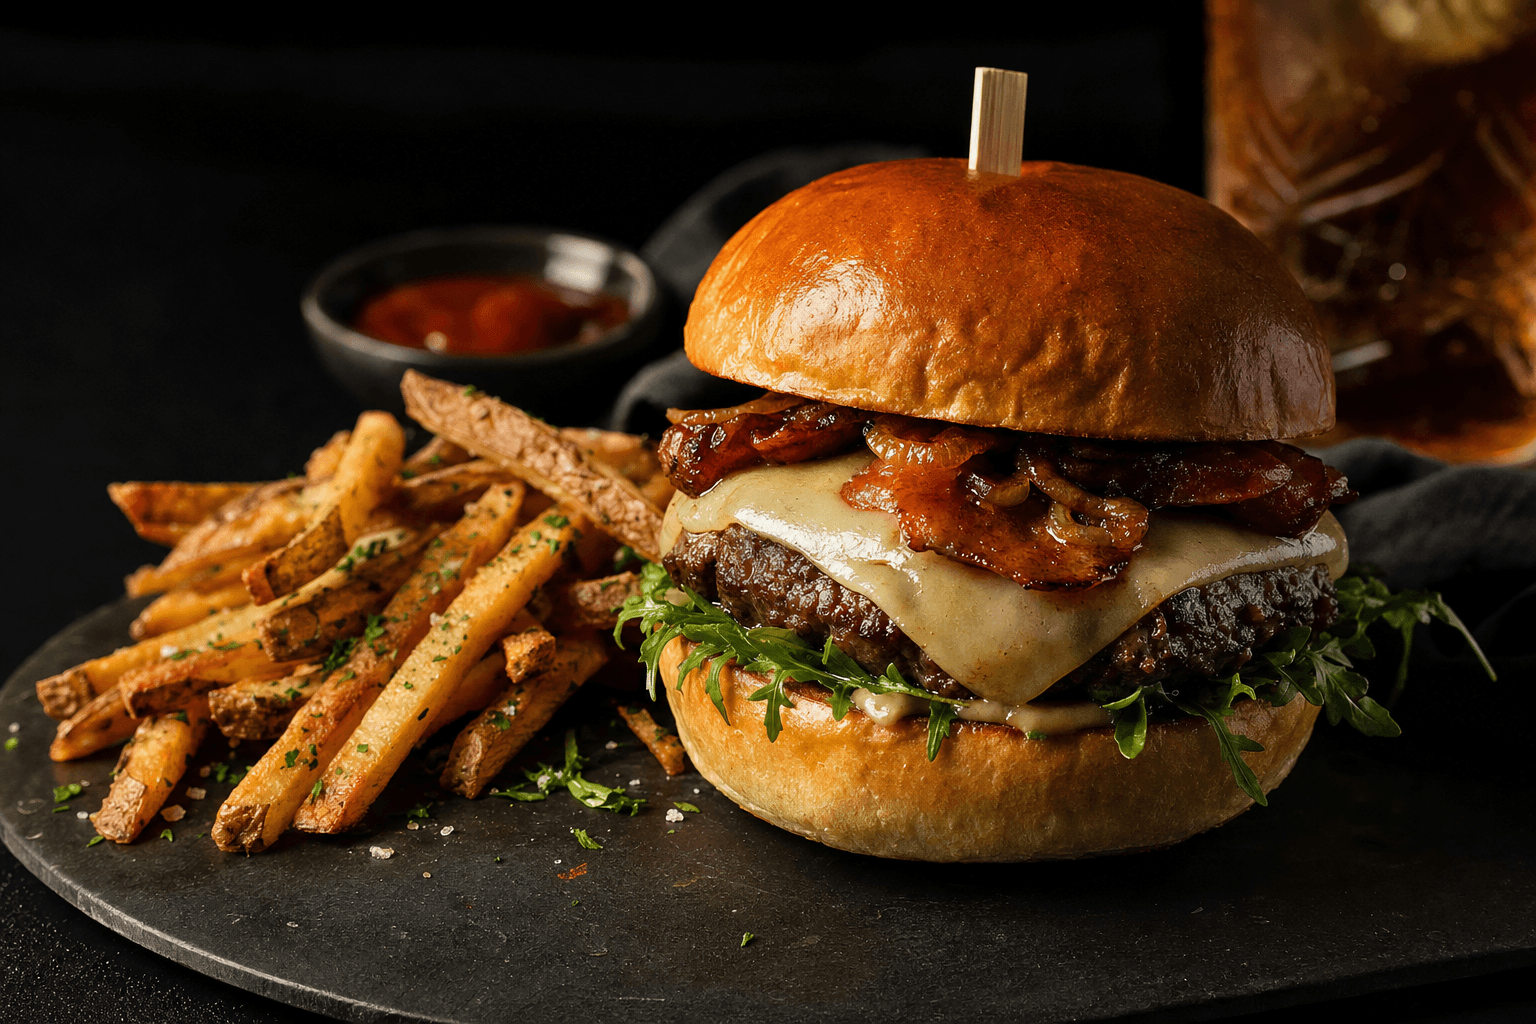
How to Photograph Food: Expert Guide to Capturing Irresistible Images
Knowing how to photograph food transforms ordinary dishes into scroll-stopping visual content that drives customer engagement and sales. Whether you’re shooting for restaurant menus, social media platforms, or e-commerce product listings, mastering food photography requires understanding the interplay between lighting, composition, styling, and technical camera settings. This guide covers the complete process from essential equipment and natural light techniques to advanced commercial workflows that Toronto restaurants and food brands use to create high-converting visual content.
You’ll learn the specific camera angles that make dishes irresistible, how to style food for different platforms, and the exact settings professionals use to capture texture and color accurately. We’ll also explore common mistakes that flatten your images, how to shoot food for different commercial purposes, workflow strategies for high-volume shoots, and video techniques for TikTok and Instagram Reels.
Quick Answer
Position food near a window with diffused natural light, shoot at a 45-degree angle using aperture f/2.8-f/5.6, and style with props that complement without overwhelming. Master these fundamentals before investing in expensive gear.
Essential Equipment for Food Photography
You don’t need a studio full of gear to create compelling food images. Start with what matters most: a camera that shoots in manual mode, a prime lens with a wide aperture, and tools to control natural light.
Your camera body matters less than your lens choice. A 50mm f/1.8 prime lens delivers sharp images with beautiful background blur at a fraction of the cost of zoom lenses. For tight overhead shots and detail work, a macro lens captures the texture of garnishes, sauce drizzles, and ingredient close-ups that make viewers taste the food through the screen.
Light control tools matter more than expensive cameras. A white foam board from any craft store becomes a bounce card that fills shadows and softens harsh light. Black foam core absorbs light to create dramatic contrast. A 5-in-1 reflector kit gives you warm, cool, and diffusion options for under fifty dollars.
Skip the tripod debate and just get one. Even a basic model eliminates camera shake during longer exposures in low light and keeps your composition consistent across multiple shots of the same dish. For smartphone shooters, your phone’s camera already shoots in manual mode through third-party apps like Halide or ProCamera. Add a small clip-on diffuser and you’ve covered 80% of social media food photography needs.
Key Takeaways
- Start with natural window light and reflectors before buying artificial lighting
- Use 45-degree angles for depth and overhead shots for flat lays
- Shoot at f/2.8-f/5.6 aperture to balance sharpness with background blur
- Style food with complementary props that enhance without distracting viewers
- Batch similar dishes together to maximize efficiency in commercial shoots
Mastering Natural Light: The Foundation of Food Photography
Natural light creates the most appetizing food images because it renders colors accurately and creates soft, flattering shadows that add dimension without overwhelming the dish. The quality of natural light changes throughout the day, and understanding these shifts helps you shoot consistently.
Window light works best two to three hours after sunrise or before sunset, when the sun sits lower in the sky and creates warmer, softer light. Avoid harsh midday sun that creates hard shadows and blown-out highlights. If you must shoot at noon, diffuse the light with a sheer white curtain or position your setup away from direct sun.
Direct vs Indirect Window Light
Direct window light creates strong contrast and defined shadows. This works beautifully for rustic dishes, breakfast scenes, and any food where you want to emphasize texture like crusty bread, grilled vegetables, or seared meats. Position your dish perpendicular to the window so light rakes across the surface, highlighting every ridge and valley.
Indirect window light comes from north-facing windows or reflected light bouncing into a room. This softer illumination suits delicate dishes like pastries, salads, and plated desserts where you want even lighting across the entire frame. The shadows stay subtle and the colors remain true without the warm cast of direct sunlight.
Managing Shadows with Reflectors and Bounce Cards
Every light source creates shadows. Your job isn’t to eliminate them but to control their intensity and position. A white bounce card placed opposite your light source fills in shadows and reduces contrast. Moving the card closer intensifies the fill light, while pulling it back creates more dramatic shadows.
Black foam core does the opposite. Place it on the lit side of your dish to absorb light and deepen shadows for a moodier, more dramatic look. This technique works exceptionally well for dark food photography styles popular on Instagram, where pools of shadow create mystery and focus attention on highlighted areas.
The distance between your dish and the window affects light quality dramatically. Closer to the window creates harder light with more contrast. Four to six feet back softens everything and reduces the light falloff across your frame.
When shooting for GTA restaurant clients, we position dishes 4-6 feet from north-facing windows and use white bounce cards to lift shadows. This creates even, appetizing light that works across breakfast through dinner service without color shifts.
Camera Angles That Make Food Look Irresistible
The angle you choose changes how viewers perceive height, texture, and portion size. Three angles dominate food photography because they each solve specific visual problems and create distinct emotional responses.
The 45-Degree Angle for Depth and Dimension
Shooting at 45 degrees mimics how we naturally view food when sitting at a table. This angle shows the height of burgers and layer cakes, captures the depth of bowls and drinks, and reveals both the top surface and the side profile of most dishes. It’s the most versatile angle in food photography.
The 45-degree angle works because it creates natural perspective that draws the eye from foreground to background. Place your hero dish in the front third of the frame, slightly off-center following the rule of thirds, and let supporting elements recede into soft focus behind it. For stacked foods like pancakes, sandwiches, and layered desserts, this angle showcases every layer while keeping the composition balanced.
90-Degree Overhead Shots and Straight-On Perspectives
Overhead flat lays shot at 90 degrees work best for table scenes with multiple dishes, pizza, pasta in shallow bowls, and any food where pattern and arrangement matter more than height. This bird’s eye view creates symmetry and balance, making it ideal for Instagram feeds where visual consistency across posts builds brand recognition.
The overhead angle eliminates perspective distortion entirely. Everything in frame appears at the same scale, which helps when photographing multiple menu items that need to look equal in importance. Straight-on or 0-degree shots work specifically for tall foods like milkshakes, layered cakes, and stacked burgers where the vertical build tells the story. This angle compresses depth and emphasizes height, making portions look generous and ingredients look abundant.
For GTA restaurant menu photography, we shoot each dish at both 45 degrees and straight overhead. The angled shot goes on the menu for emotional appeal, while the overhead version works for online ordering platforms where customers need to see exactly what they’re getting.
Composition and Styling Techniques for Food Photos
Composition arranges elements within your frame to guide the viewer’s eye and create visual balance. Food styling makes the dish itself look fresh, abundant, and irresistible. Master both and your images jump off the screen.
The rule of thirds divides your frame into a 3×3 grid. Position your main dish where the lines intersect rather than dead center. This creates tension and interest that centered compositions lack. Negative space gives the eye room to rest and emphasizes your subject. Don’t fill every inch of the frame with props and garnishes.
Odd numbers create more natural, organic compositions than even numbers. Style with three cookies instead of four, five fries instead of six, one drink plus three small plates instead of two of each. Props should support the story without stealing attention. Choose plates, utensils, and backgrounds that complement the food’s color palette. A bright orange curry pops against a dark slate background. Pale pastries need darker surfaces or rich wood tones to create contrast.
Fresh garnishes make the difference between a dish that looks staged and one that looks just-prepared. Add that final herb sprig, dust of powdered sugar, or drizzle of sauce immediately before shooting. Steam rising from hot food tells viewers it’s fresh, so shoot quickly after plating or use a handheld steamer just out of frame to add that visual cue.
Texture layering creates depth in two-dimensional images. Pair smooth surfaces with rough ones: a creamy soup with rusty bread, a shiny glaze against a rustic wooden board, soft whipped cream on a textured waffle. When shooting complete photo and video content packages for Toronto restaurants, the styling approach shifts based on platform. Instagram content uses more styled props and environmental context, while menu photography keeps backgrounds neutral and focuses entirely on accurate food representation.
Ready to book a free consultation?
Sina and the Roopol Studio creative team help Toronto and GTA brands and restaurants create visual content that converts.
Manual Camera Settings for Food Photography
Automatic mode makes decisions based on the entire scene, not just your dish. Manual mode gives you control over exactly what stays sharp and how the background renders. Three settings work together: aperture, shutter speed, and ISO.
Aperture controls depth of field and how much light enters your lens. Set your aperture between f/2.8 and f/5.6 for most food photography. This range keeps your main dish sharp while softening the background into creamy blur that eliminates distractions. Go wider to f/1.8 or f/2 only when shooting single small items like cookies or cocktails where you want extreme background separation.
Narrower apertures like f/8 or f/11 keep more of the frame in focus, which works well for overhead flat lays where you want everything sharp from front to back. The tradeoff is less light reaching your sensor, requiring longer shutter speeds or higher ISO to maintain proper exposure.
Shutter speed determines how long light hits your sensor. For static food photography, keep your shutter speed at 1/125 second or faster when handholding to avoid camera shake. Drop to 1/60 or slower only when using a tripod, which becomes necessary in dim restaurant environments where you need to maintain low ISO for clean images.
ISO measures sensor sensitivity to light. Start at ISO 100 or 200 in bright window light for the cleanest images with no grain. Raise ISO only when you’ve maxed out your aperture and slowed your shutter speed as much as possible. Modern cameras handle ISO 800-1600 well, but grain becomes noticeable and colors shift slightly, requiring more correction in post-production.
White balance tells your camera what color temperature to treat as neutral white. Auto white balance works in consistent light but struggles in mixed lighting situations common in restaurants where window light and interior tungsten bulbs create competing color casts. Set white balance manually using the Kelvin scale: 5500K for daylight, 3200K for tungsten bulbs, or use a custom white balance reading from a neutral gray card.
Shoot in RAW format rather than JPEG. RAW files capture all the data your sensor records, giving you maximum flexibility to adjust exposure, color, and sharpness in post-production without degrading image quality. Test your settings by shooting a reference frame, checking the histogram instead of the LCD preview which appears brighter than the actual file.
Common Food Photography Mistakes and How to Fix Them
Even experienced photographers fall into predictable traps that flatten images and make food look unappetizing. Recognizing these mistakes helps you shoot better from the start and fix problems during editing and post-production.
Technical Lighting Mistakes
Shooting in poor light creates more problems than post-production can solve. Dim restaurant interiors with mixed color temperatures produce muddy, yellow-green images that require aggressive color correction. If you must shoot in low light, add a small LED panel with adjustable color temperature to lift shadows and provide a clean key light that matches or overpowers the ambient lighting.
Using the built-in flash kills dimension and creates harsh shadows. The flat, frontal light eliminates the subtle shadows that define texture and shape. Instead, bounce an off-camera flash into a white ceiling or wall to create softer, more directional light that mimics window illumination. Better yet, move your setup to natural light whenever possible.
Composition and Angle Errors
Cluttered compositions distract from the food. New photographers add too many props, fill the frame edge-to-edge, and create visual chaos. Simplify ruthlessly. Remove anything that doesn’t actively support the story or enhance the dish. Wrong angles make dishes look flat or distorted. Shooting tall foods from overhead compresses them into shapeless circles. Photographing pizza at 45 degrees shows only the front edge clearly while the back falls out of focus.
Fixing Common Problems in Post-Production
Over-editing creates unnatural colors and contrast. That Instagram filter that makes everything pop also makes food look artificial and unappetizing. Edit toward accuracy rather than impact. Viewers should be able to recognize the dish when it arrives at their table. Boost saturation slightly to compensate for how cameras capture color, but stop before reds glow neon and greens turn radioactive.
Color correction for mixed lighting requires layered adjustments in post-production. Start by setting a neutral white balance using a white or gray element in the frame. Then use selective color tools to shift yellow-green casts in shadow areas back toward neutral. Add a warming adjustment layer to bring back appetizing warmth without pushing into orange territory.
Removing unwanted reflections from glasses, shiny plates, and polished tables requires either fixing the lighting during the shoot or cloning them out afterward. During shooting, adjust the light angle or use a polarizing filter to minimize reflections. In post-production, use the spot healing or clone stamp tool to sample clean areas and paint over small reflections, being careful to match texture and tonality.
Sharpening brings out food texture but too much creates halos and artificial-looking edges. Apply sharpening selectively to the main dish while leaving backgrounds soft. Use the clarity slider in moderation to enhance midtone contrast and make textures pop without creating an overly processed look.
Shooting Food for Different Commercial Purposes
Different platforms and use cases require different technical approaches. Menu photography, social media content, and e-commerce product shots each have specific requirements that affect how you shoot and edit.
Restaurant Menus vs Social Media Content
Menu photography demands accuracy above all else. Customers need to see exactly what they’ll receive, which means shooting in even, neutral light with minimal styling and accurate colors. The dish fills most of the frame against a simple background. Props are minimal or absent. The goal is clear communication, not artistic expression.
Social media content prioritizes stopping the scroll. These images need strong visual hooks: dramatic lighting, styled environments, human elements like hands holding food or pouring drinks, and compositions that tell a story beyond the dish itself. Shoot both tight detail shots and wider lifestyle scenes that show context and create aspiration.
Technical specs differ significantly. Menu photos for print need high resolution at 300 DPI and neutral color profiles that reproduce accurately in CMYK printing. Social media content lives at screen resolution, typically 1080×1080 pixels for Instagram or 1080×1920 for vertical formats, and uses RGB color space with slightly boosted saturation that looks vibrant on backlit screens.
E-Commerce and Advertising Photography
E-commerce food photography requires multiple angles and consistent lighting across an entire product line. Shoot on pure white backgrounds at f/8 or narrower to keep everything in focus from front to back. Customers need to see packaging details, ingredient textures, and accurate colors for online ordering decisions.
Advertising photography allows more creative freedom with dramatic lighting, bold compositions, and conceptual styling that creates emotional connections. These hero images might show only part of the dish, use extreme angles, or incorporate motion blur and splashing liquids for dynamic impact. The goal shifts from documentation to aspiration and brand storytelling.
Workflow Efficiency for High-Volume Food Shoots
Shooting ten or twenty dishes in a single session requires systematic workflow planning that maintains quality while maximizing efficiency. Professional food photographers working with restaurants batch similar items, prepare detailed shot lists, and coordinate closely with kitchen staff.
Pre-Shoot Planning and Shot Lists
Create a detailed shot list that sequences dishes by temperature and timing. Shoot hot foods first while they look fresh, then move to room temperature items, and finish with cold dishes and drinks that hold their appearance longest. Coordinate with the kitchen so dishes arrive camera-ready at five-minute intervals, giving you time to shoot without food sitting under lights and deteriorating.
Group dishes by styling requirements and shooting angle. Shoot all overhead flat lays together without moving your camera position, then switch to angled shots for another batch. This eliminates time wasted adjusting tripods and lighting between each dish. Keep your lighting setup constant throughout similar shots to maintain visual consistency.
Batch Shooting Multiple Dishes
Prepare your set completely before the first dish arrives. Test lighting with a stand-in plate, confirm your camera settings produce the look you want, and have all props, backgrounds, and styling tools within arm’s reach. Once food starts arriving, you’re shooting continuously with no time for major adjustments.
Shoot tethered to a laptop or tablet when possible. This lets you review images at full size immediately, catch focus or exposure problems before moving to the next dish, and share previews with clients or chefs who can request adjustments while everything is still set up. When shooting social media content creation services for GTA restaurant clients, Roopol Studio typically captures both photo and video of each dish in a single setup, doubling content output without doubling shoot time.
Client Communication Templates
Standardize client communication with templates that cover pre-shoot questionnaires, shot list approval forms, and delivery specifications. Send a pre-shoot questionnaire asking about intended use, preferred angles, styling preferences, and any dishes requiring special handling. This eliminates confusion and reduces revision requests.
Create a shot list approval template showing thumbnail sketches of planned angles and compositions for each dish. Getting client sign-off before the shoot protects you from scope creep and ensures everyone shares the same vision. After the shoot, deliver images with a contact sheet showing file numbers, descriptions, and technical notes for easy selection and reference.
Video-First Content Strategy for Food Photography
Static images no longer dominate food marketing. Short-form vertical video on TikTok, Instagram Reels, and YouTube Shorts drives more engagement and converts better than traditional photography for many food businesses. A video-first strategy captures both formats simultaneously, maximizing content from each dish.
Technical Setup for Short-Form Vertical Video
Vertical video at 9:16 aspect ratio now takes priority over horizontal formats. Position your camera or phone vertically and compose for the tall frame from the start rather than cropping later. This orientation fills mobile screens completely, eliminating the black bars that signal outdated content.
Lighting for video requires continuity that flash photography doesn’t. Continuous LED panels replace strobes, and you need enough light output to maintain proper exposure at 1/50 second shutter speed for natural motion blur. The same diffused window light that works for stills translates perfectly to video when supplemented with LED fill light for shadow control.
Movement and Action Techniques for Reels and TikTok
Movement makes food videos work. Static shots of plated food perform poorly compared to process videos that show action: pouring sauce, cutting into a burger to reveal layers, sprinkling garnish, steam rising from fresh-cooked dishes. Plan these moments before the camera rolls and execute them with deliberate, slow movements that read clearly on small screens.
Sound matters enormously in food video. The sizzle of meat on a grill, the crack of breaking into creme brulee, the pour of a cocktail into ice creates visceral responses that silent video can’t match. Capture clean audio using a directional microphone positioned close to the action, or add sound design in editing using high-quality food sound effects.
Editing and Platform Optimization
Keep food videos short and punchy. The first three seconds determine whether viewers scroll past or watch through. Start with the most visually striking moment, whether that’s the money shot of a dish being plated, the first bite revealing texture, or an unexpected element that creates curiosity.
Batch video capture alongside still photography by adding simple movements to each setup. After shooting your hero still images, run the sequence again while a hand enters frame to interact with the food, or capture a slow dolly movement across the dish. These brief clips edit together into Reels that repurpose your photography session into video content.
Edit vertically with text overlays positioned in the upper and lower thirds of the frame where they won’t obscure the main subject. Add quick cuts every 2-3 seconds to maintain pace. Use trending audio tracks on TikTok and Reels to boost algorithmic distribution, but ensure the music matches your brand’s tone and doesn’t overpower food sounds.
Frequently Asked Questions
What is the best camera angle for photographing food?
The 45-degree angle works best for most dishes because it shows both the top surface and side profile, creating depth and dimension. Use 90-degree overhead shots for flat foods like pizza and pasta, and straight-on 0-degree angles for tall items like burgers and layered cakes.
How do you light food photography with natural light?
Position your dish 4-6 feet from a window during morning or late afternoon when sunlight is softer. Diffuse harsh direct light with a sheer white curtain, then use white foam boards opposite the window to fill shadows and reduce contrast.
What camera settings should I use for food photography?
Set aperture between f/2.8 and f/5.6 to keep your dish sharp while softening backgrounds. Use shutter speed of 1/125 second or faster when handholding, slower when using a tripod. Start at ISO 100-200 in good light and shoot in RAW format.
Do I need expensive equipment to take good food photos?
No. A smartphone with manual controls, natural window light, and basic white foam boards produce excellent results for social media and most commercial uses. A 50mm f/1.8 prime lens on any camera delivers professional quality at minimal cost.
How do I photograph food in low light or at restaurants?
Increase ISO to 800-1600, open aperture to its widest setting like f/1.8 or f/2, and use a tripod to allow longer shutter speeds without camera shake. Add a small battery-powered LED panel with adjustable color temperature to provide clean fill light.
Transform Your Food Photography Into Revenue-Generating Content
Mastering how to photograph food means understanding that technical skills serve the larger goal of creating images that drive customer action. The fundamentals covered here work whether you’re shooting with a smartphone for Instagram or a professional camera for print menus. Start with controlled natural light, choose angles that showcase each dish’s best features, and style with intention rather than filling the frame with props.
Roopol Studio helps Toronto and GTA restaurants and food brands create professional food photography services and video content that converts browsers into customers. Sina and the creative team combine technical expertise with an understanding of how visual content performs across platforms, from traditional print applications to TikTok and Instagram Reels. Ready to create food photography that makes viewers hungry? Book a free consultation to discuss your content needs and see how strategic food photography transforms your marketing.