

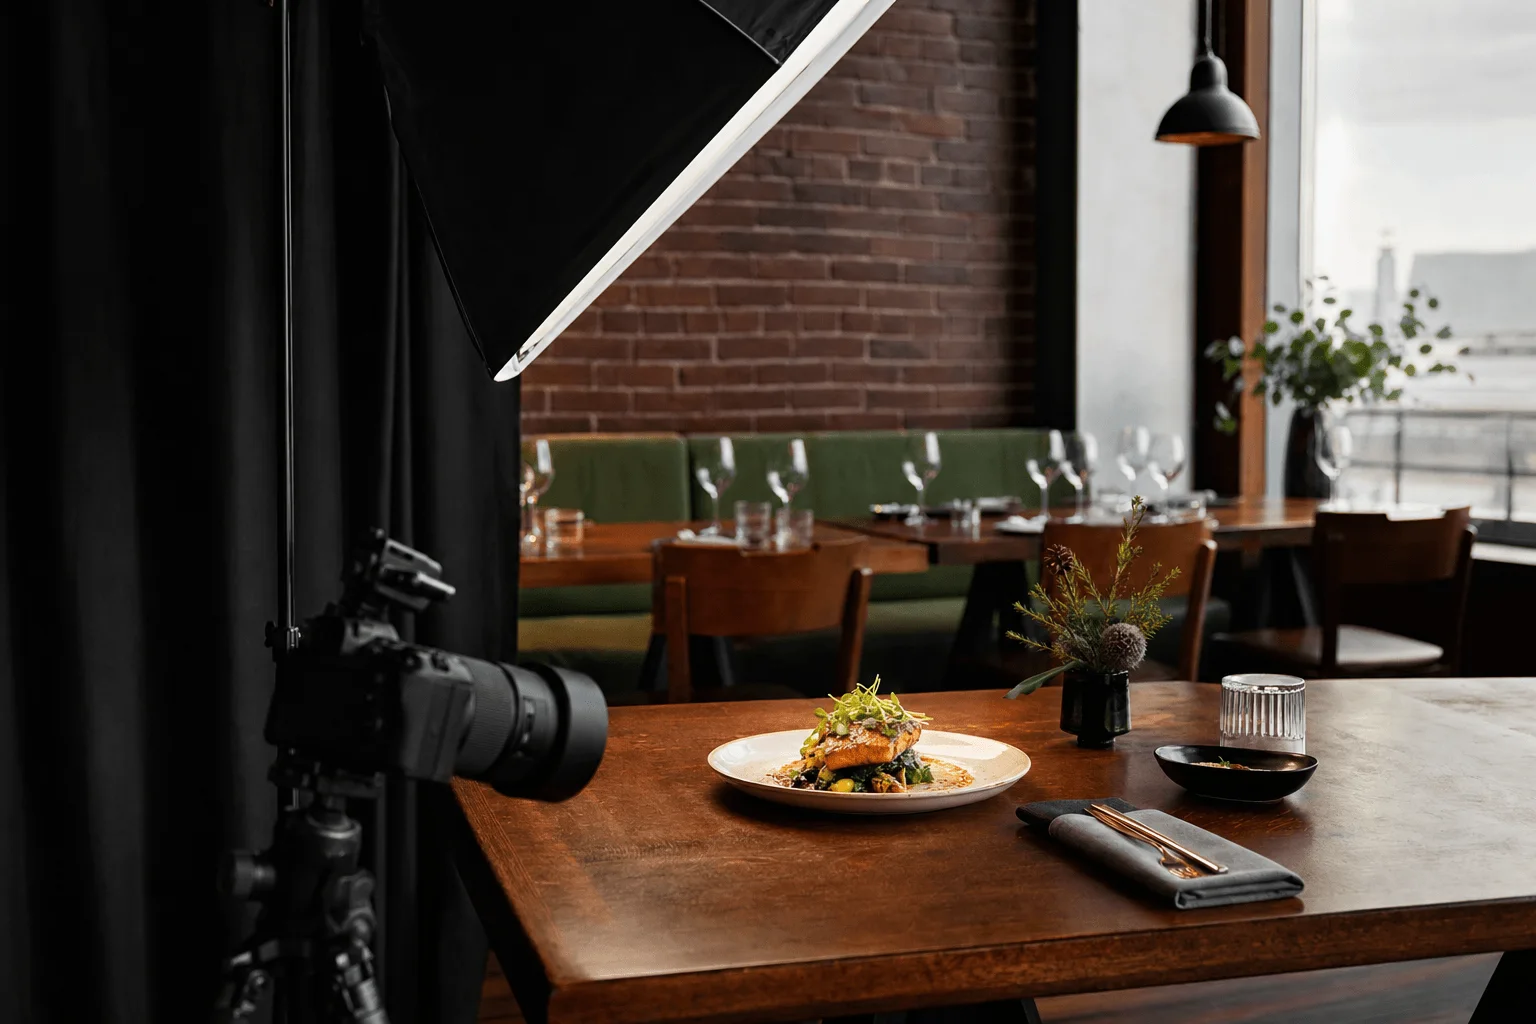
Preparing your restaurant for a professional photoshoot is about more than cleaning tables and plating dishes. It’s a strategic process that determines whether your investment yields scroll-stopping content or forgettable images. From scheduling around natural light cycles to coordinating kitchen timing with camera setups, every detail shapes your final results.
This guide walks you through the complete restaurant photography preparation process, from defining your visual goals two weeks before the shoot to understanding what happens after the photographer leaves. You’ll learn how to create an effective shot list, stage your space for maximum visual impact, coordinate food styling with your photographer, and manage the post-shoot workflow that turns raw captures into brand-ready content.
Whether you’re booking your first food photoshoot or refining your approach for seasonal menu updates, these strategies will help you maximize your session and create images that drive reservations.
Quick Answer
Prepare your restaurant for a professional photoshoot by creating a detailed shot list aligned with your marketing goals, scheduling during optimal lighting hours, staging and deep-cleaning your space, coordinating fresh food preparation with your photographer’s timeline, and confirming all technical details two weeks in advance.
Define Your Photography Goals and Create a Shot List
Your shot list is the blueprint that transforms vague ideas into concrete deliverables. Start by identifying where these images will live. Social media carousel posts require different compositions than website hero images. Menu boards need clear, centered plates. Instagram stories demand vertical framing.
Write down every specific shot you need before contacting a photographer. List signature dishes by name. Note which dining spaces showcase your ambiance best. Identify detail shots that tell your brand story: the pour of a craft cocktail, steam rising from fresh pasta, the texture of your custom ceramic plates.
Sina at Roopol Studio typically starts restaurant projects with a consultation that turns a client’s general wish list into a categorized shot list: hero dishes, supporting menu items, space and ambiance shots, detail and styling shots, and team or process documentation if relevant. This structure ensures nothing gets missed during the session.
Prioritize your list by marketing value. Your three signature dishes always come first. These are the images that will carry your brand across every platform. Budget for extra time on these hero shots: multiple angles, varied styling, different lighting setups.
Key Takeaways
- Create a detailed shot list organized by marketing priority and platform usage
- Schedule shoots during optimal natural light hours for your restaurant layout
- Deep-clean and stage spaces two days before to allow final touch-ups
- Coordinate fresh food prep timing with photographer’s workflow and shot sequence
- Confirm technical details and contingency plans two weeks before shoot date
Schedule Your Photoshoot at the Optimal Time
Timing determines light quality, and light quality determines everything else. Natural light changes dramatically throughout the day, and your restaurant’s window orientation creates specific opportunities and limitations.
East-facing windows flood spaces with soft morning light between 8 AM and 11 AM. This works beautifully for breakfast and brunch content. West-facing windows do the opposite: harsh midday light followed by warm afternoon glow from 3 PM to 6 PM. South-facing windows in Toronto and GTA locations provide consistent indirect light most of the day, making them ideal for flexible scheduling.
Schedule during off-hours whenever possible. Closed restaurants give photographers control over every variable: lighting modifiers stay in place, styling adjustments happen without time pressure, and no customers appear in background shots. Most restaurants book Monday or Tuesday morning sessions, when kitchens are fresh but the restaurant is closed to diners.
Consider seasonal factors if you’re shooting in Toronto. Winter sessions between November and February face early sunsets and limited natural light. Book earlier start times, typically 9 AM, to capture maximum daylight hours. Summer sessions have the opposite luxury but bring intense midday sun that requires more diffusion and lighting control.
Account for food preparation time when setting your start time. If you’re photographing ten dishes, your kitchen needs advance notice. A typical professional restaurant photography service session with 8 to 12 plated dishes requires 3 to 4 hours of active shooting, but plan for 5 to 6 hours total to include setup, styling adjustments, and kitchen coordination.
We schedule most Toronto restaurant shoots with a 90-minute window before official start time. This buffer lets us test lighting setups while your kitchen preps first dishes, so when cameras roll, everything moves efficiently without rushed plating or cooling food.
Prepare Your Restaurant Space for Photography
Your space is a character in every shot. Clean, staged environments make food look premium. Cluttered, overlooked details scream amateur hour.
Cleaning and Staging Your Dining Area
Deep-clean two days before the shoot, not the morning of. This gives you buffer time to catch missed spots and make final touch-ups without rushing.
Clean beyond your normal service standards. Photographers notice what diners don’t. Dust on light fixtures becomes visible in wide shots. Fingerprints on glassware catch light and ruin compositions. Scuff marks on walls appear darker on camera than in person.
Remove everything that doesn’t serve your brand story. Take down promotional posters, daily specials boards, and any temporary signage. Clear table tents and check presenters. Remove branded items you don’t want visible: certain beverage logos, delivery service stickers, outdated menu cards.
Stage tables with intention. Set one or two tables fully dressed as they would appear during service: fresh linens, polished silverware, spotless glassware. Leave other tables clear so the photographer has flexibility. Bring backup tableware: extra plates in your signature style, multiple sets of flatware, several glassware options.
Lighting Considerations: Natural vs Artificial
Natural light creates the most appetizing food photography, but only when properly controlled. Direct sunlight is your enemy. It creates harsh shadows, blown-out highlights, and uneven color temperatures that make food look unappetizing.
If your shoot space has large windows, communicate this with your photographer beforehand. They’ll bring diffusion materials to soften direct sun or schedule around optimal indirect light hours. North-facing windows in Toronto locations provide the most consistent soft light throughout the day.
Don’t turn off all your artificial lights to force natural light. Ambient restaurant lighting adds warmth and depth. The best food photography combines multiple light sources: soft natural light as the key, artificial lights for fill and ambiance, and professional lighting modifiers for control.
Ready to book a free consultation?
Sina and the Roopol Studio creative team help Toronto and GTA brands and restaurants create visual content that converts.
Coordinate Food Preparation and Styling
Food dies on camera fast. Lettuce wilts. Sauces separate. Steam disappears. The window between perfect plating and unappetizing decay measures in minutes, not hours.
Menu Item Selection Strategy
Choose dishes that photograph well and represent your brand accurately. Prioritize visual variety: a vibrant salad, a rich protein dish, a sauce-forward plate, a textured appetizer, a dramatic dessert. Visual diversity makes your portfolio feel complete rather than repetitive.
Consider how dishes hold up under lights. Delicate herbs wilt quickly. Whipped cream melts. Rare proteins darken as they oxidize. Fried foods lose their crisp appearance. Discuss these factors with your photographer and adjust recipes slightly for camera longevity without compromising authenticity.
Plating and Food Styling Techniques
Plate for camera, not for service. Photography exaggerates height, amplifies color, and rewards intentional composition in ways the human eye forgives but cameras don’t.
Build height wherever possible. Stack components deliberately. Lean elements against each other. Tall food creates depth and drama in photographs. Flat food looks boring.
Keep plating cleaner than you would for service. Cameras magnify every sauce smear and imperfect drip. Wipe plate rims completely. Use precise sauce applications. Remove any garnish pieces that look wilted or imperfect.
Use fresh garnishes and add them last. Herb sprigs wilt under lights within minutes. Add delicate garnishes immediately before shooting. A light brush of oil makes proteins glisten. Water droplets on fresh vegetables signal freshness.
Coordinate timing with your photographer’s workflow. Plating too early means degraded food. Plating too late wastes expensive shoot time. The ideal rhythm: photographer sets up lighting and composition with a stand-in plate, then your team delivers the fresh final plate for actual shooting.
We photograph hero dishes first while kitchen energy is high and food quality peaks. Supporting menu items come next. Ambient and detail shots happen last when timing pressure drops. This sequence maximizes the window of perfect plating for your most important images.
Essential Questions to Ask Your Photographer Before the Shoot
Clear expectations prevent disappointing surprises. Ask these questions during your initial consultation, not the morning of your shoot.
What’s included in your photography package, and what costs extra? Understand exactly what you’re paying for: number of edited images, shooting hours, usage rights, revision rounds, rush delivery fees. Get this in writing.
How many final edited images will I receive, and how are they selected? Some photographers deliver every usable shot. Others provide a curated selection. Know which approach you’re getting and whether you can purchase additional edited images.
What’s your turnaround time, and what does the editing process include? Standard turnaround typically ranges from one to three weeks. Rush delivery often costs extra. Confirm what level of editing is included: color correction, exposure adjustment, minor blemish removal, or more extensive retouching.
Who owns the image rights, and how can I use the photos? This matters enormously. Full commercial usage rights let you use images anywhere forever. Limited licenses might restrict you to specific platforms or time periods. Most professional restaurant photography services grant full commercial usage to restaurant clients, but always confirm in writing.
What equipment and backup systems do you use? Professional photographers shoot with backup camera bodies and redundant storage systems. This protects your investment. If equipment fails or files corrupt, you want a photographer with backup systems that prevent losing an entire shoot.
What happens if you can’t make the shoot date? Illness and emergencies happen. Professional studios have contingency plans: backup photographers, rescheduling policies, and clear communication protocols. Understand these policies before committing.
Should we provide props and styling materials, or do you bring them? This varies by photographer. Some bring extensive prop collections. Others expect restaurants to provide plates, glassware, and styling elements. Roopol Studio typically works with a restaurant’s existing tableware to maintain brand authenticity but brings supplementary styling elements like linens, backgrounds, and small props when needed.
Pre-Shoot Preparation Timeline: 2 Weeks to Day-Of Checklist
A structured timeline prevents last-minute panic and ensures nothing falls through the cracks.
| Timeline | Restaurant Tasks | Expected Outcomes |
|---|---|---|
| 2 Weeks Before | Finalize shot list, confirm menu items, book photographer, discuss location and lighting, confirm usage rights and deliverables | Complete creative brief, signed contract, scheduled date and time locked |
| 1 Week Before | Deep-clean scheduled, props and tableware selected, backup dishes identified, staff roles assigned, contingency plans confirmed | All logistics confirmed, team briefed, no outstanding questions |
| 2 Days Before | Deep-clean executed, test plates staged, final walkthrough completed, all surfaces cleaned and checked | Space camera-ready, minor touch-ups only needed day-of |
| Day Before | Ingredient shopping completed, prep work started, surfaces re-checked, photographer arrival plan confirmed | All ingredients fresh and ready, kitchen prep timeline finalized |
| Day Of Shoot | Final space check, lighting tested, first dishes prepped on standby, team in position, clear communication established with photographer | Smooth execution, no delays, efficient workflow from first shot to wrap |
2 Weeks Before Your Photoshoot
Two weeks out, your shot list should be finalized and approved by your photographer. This document becomes your contract: what gets shot, in what order, with what priority. Changes after this point create confusion and waste shoot time.
Confirm all technical details in writing. Shoot date, start time, expected duration, location within your restaurant, parking information if relevant. Provide your photographer with your restaurant’s address and any access instructions for arriving before business hours.
Review your menu and confirm all photographed dishes will be available. If you’re shooting a seasonal menu, don’t schedule the shoot before ingredients are reliably in stock.
1 Week Before Your Photoshoot
One week before, assign specific responsibilities to your team. Who’s plating dishes? Who’s coordinating timing with the photographer? Who’s managing the space and keeping it clear of distractions? Everyone should understand their role before shoot day arrives.
Order or purchase any special props, backgrounds, or styling elements you want to incorporate. If you’re introducing new tableware specifically for photos, have it in-house a week early. Don’t gamble on last-minute delivery.
Day Before and Day Of Your Photoshoot
The day before, complete all ingredient shopping. Fresh produce, proteins, and garnishes should be purchased within 24 hours of shooting for maximum visual quality. Wilted herbs and tired vegetables are impossible to hide on camera.
Prep everything that can be prepped without compromising quality. Sauces can be made ahead. Vegetables can be washed and organized. Proteins can be portioned. The more prep work completed in advance, the smoother your shoot-day timing.
Shoot morning, arrive earlier than your photographer. Turn on lights, set climate control to comfortable levels, have coffee ready. Small hospitality gestures create positive energy that carries through the entire session.
Start your first dish prep as the photographer sets up lighting. This parallel workflow maximizes efficiency. By the time cameras are ready, your first plate is ready.
What to Expect During and After Your Restaurant Photoshoot
Professional shoots follow a rhythm: setup, hero shots, supporting content, detail work, breakdown. Understanding this flow helps you support the process rather than disrupt it.
During the Photoshoot
Setup typically takes 30 to 60 minutes. Your photographer tests lighting, sets up backdrops or modifiers, and shoots test frames to dial in exposure and composition. Don’t plate food during this phase. Wait for the signal that cameras are ready.
Hero dishes always come first while everyone’s energy peaks. These signature plates get the most time, most angles, most styling attention. Expect 15 to 30 minutes per hero dish depending on complexity.
Supporting menu items follow a faster pace once lighting is dialed in. Each dish might get 10 to 15 minutes unless styling issues emerge. The photographer reuses similar setups with minor adjustments, making this middle phase the most efficient.
Detail shots and ambiance photography happen last. These don’t require perfect plating timing, so they’re ideal for the end of the session when food pressure drops.
Stay present and engaged throughout the shoot, but trust your photographer’s creative direction. Collaboration works best when restaurant owners provide context and preferences while photographers control technical execution.
Managing Customer Presence During Operating Hours
Shooting in an open restaurant adds complexity but isn’t impossible. Block off the shooting area with subtle barriers like stanchions with elegant ropes or strategically placed plants. These create visual boundaries without disrupting your space.
Train your staff to manage customer curiosity. Empower hosts and servers to politely redirect guests away from shooting areas. Consider offering a small discount or complimentary appetizer to customers seated near the shoot. This goodwill gesture acknowledges the minor inconvenience and often turns potential complaints into positive experiences.
Schedule shots that require complete control during closed hours. Hero dishes, wide room shots, and anything requiring extensive lighting setup works better without customers. Save simpler shots for open hours: detail work, specific tight dishes, or content that works within smaller controlled spaces.
Brief your entire team before the shoot about expected disruptions and their roles in maintaining customer service standards. Assign one staff member as the photographer’s point of contact to avoid confusion. This person coordinates timing, answers questions, and helps navigate customer management challenges.
Post-Shoot Workflow and Delivery Process
After the photographer leaves, within 24 to 48 hours, you should receive confirmation of successful file backup and an estimated delivery timeline. Professional studios shoot with redundant storage, backing up files immediately after each session.
The editing process typically takes one to three weeks depending on the photographer’s workload and the number of images in your package. During this time, your photographer culls the best shots, makes exposure and color adjustments, removes minor distractions, and exports files in the formats you’ve requested.
Image selection happens first. Your photographer reviews hundreds or thousands of raw captures, eliminating duplicates, focus errors, and compositions that didn’t work. This culling process typically reduces the raw capture count by 60 to 80 percent.
Editing comes next. This includes exposure correction, color grading, white balance adjustment, minor retouching to remove distractions, and sharpening for final delivery. Professional editing makes good images great, but it can’t rescue fundamentally flawed shots.
File export follows editing. Your photographer prepares images in the agreed-upon formats and resolutions. Most restaurant clients receive high-resolution JPEGs suitable for both print and digital use, typically 3000 to 5000 pixels on the long edge.
Delivery happens through digital galleries or file transfer services. You’ll receive a link to download your images, usually through platforms like Pixieset, Dropbox, or Google Drive. Download everything immediately and create backups. Gallery links often expire after 30 to 90 days.
Most photographers include one round of minor revisions. This covers adjustments like brightness tweaks, cropping changes, or removal of small distractions. It doesn’t typically include re-editing entire images from scratch or adding elements that weren’t shot. Make your revision requests clearly and all at once to avoid confusion.
Usage rights documentation should accompany your final delivery. This confirms what you’re legally allowed to do with the images: social media posting, website use, print advertising, third-party licensing. Keep this documentation accessible in case questions arise later.
Seasonal and Menu Refresh Photography Strategies
One photoshoot rarely serves a restaurant’s content needs forever. Strategic planning ensures your visual brand evolves with your menu while maintaining consistency.
Schedule photography around major menu changes. If you refresh your menu seasonally, plan shoots shortly after each menu launch. This keeps your marketing aligned with what you’re actually serving. Nothing frustrates customers more than ordering based on photos of discontinued dishes.
Plan quarterly content refreshes even if your menu stays consistent. Social media platforms reward fresh content. Reposting the same images repeatedly signals stagnant brands. Quarterly shoots provide steady content flow without overwhelming your marketing budget.
Capture seasonal variations of signature dishes. If your burger is a year-round staple but toppings change seasonally, shoot it four times across the year. This creates visual variety while maintaining brand consistency around your core offerings.
Bundle photography with other content creation for efficiency. Roopol Studio structures many restaurant packages around combined sessions: food photography, behind-the-scenes video, team portraits, and social media content creation all captured in one intensive day. This approach maximizes the value of setup time and kitchen coordination.
Build a content library over time rather than trying to shoot everything at once. Your first session captures hero dishes and essential space shots. Second session adds supporting menu items and seasonal specials. Third session layers in team content and process shots.
Toronto’s seasonal light changes affect photography aesthetics. Summer shoots capture bright, airy vibes with natural light flooding through windows. Winter shoots lean into cozy, warm, intimate aesthetics with more controlled artificial lighting. Plan your shoot timing to match the emotional tone you want in final images.
Maintain visual brand consistency across all shoots by using the same photographer when possible. Consistent editing styles, similar color grading, and familiar composition approaches create cohesive brand identity even as menu items change seasonally. Discuss your brand’s visual guidelines with your photographer: color palettes, composition preferences, styling choices. Document these preferences for future reference.
Frequently Asked Questions
When is the best time to schedule a restaurant photoshoot?
The best time depends on your restaurant’s window orientation. For east-facing windows, schedule between 8 AM and 11 AM for soft morning light. West-facing spaces work best from 3 PM to 6 PM. South-facing windows provide consistent indirect light most of the day. Always schedule during closed hours if possible, typically Monday or Tuesday mornings.
How long does a restaurant food photoshoot usually take?
A typical restaurant photoshoot with 8 to 12 menu items requires 3 to 4 hours of active shooting time. Plan for 5 to 6 total hours including setup, lighting tests, styling adjustments, and breakdown. Hero dishes receive 15 to 30 minutes each, while supporting items move faster at 10 to 15 minutes once lighting is established.
Should the photographer provide props and styling materials or should the restaurant?
This varies by photographer. Most bring basic styling tools like backgrounds, linens, and small props. Restaurants typically provide their own tableware, glassware, and branded elements to maintain authenticity. Discuss expectations during your initial consultation to clarify who provides what.
How many menu items should we photograph during one session?
Plan for 8 to 12 menu items in a standard half-day session, or 15 to 20 in a full-day shoot. Prioritize hero dishes that represent your brand and drive orders. Include visual variety: different colors, textures, and plating styles. Quality matters more than quantity.
How long does it take to receive the finished photos after the shoot?
Standard turnaround ranges from one to three weeks depending on the photographer’s workload and the number of images in your package. This includes culling the best shots, editing for exposure and color, minor retouching, and exporting files. Rush delivery often costs extra but can deliver finals within 3 to 5 business days.
Professional restaurant photography transforms your marketing from forgettable to craveable. But the images are only as good as the preparation behind them. Every detail matters: the timing that captures perfect light, the staging that showcases your brand, the food styling that makes dishes irresistible, and the coordination that keeps everything running smoothly.
Roopol Studio specializes in restaurant and food photography throughout Toronto and the GTA, working with local establishments to create content that drives reservations and builds brand recognition. Ready to showcase your restaurant with stunning professional photography? Book a free consultation and let’s plan your shoot together.